
Unity:プレファブ(Prefab)の作成と使い方
はじめに
Unityの機能で プレファブ(Prefab) と言う機能があります。どういった機能かと言うと一度作ったパーツ・機能を使いまわしたい場合に使用する機能になります。
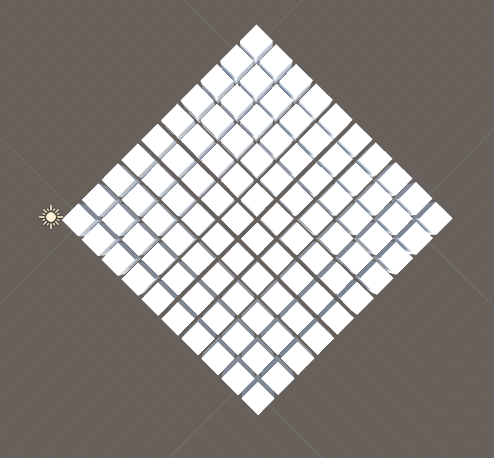
以下のようにキューブを10×10で、計100個配置するのも簡単になります。
Unityを知らない方は、ぜひ こちらの記事 をご参照ください。
使い方
プレファブ(Prefab)は事前に作成を行うステップと、生成して使うステップに分かれますので説明もその流れで行います。
プレファブ(Prefab)の作成
まずは、プレファブ(Prefab)の作成を行います。
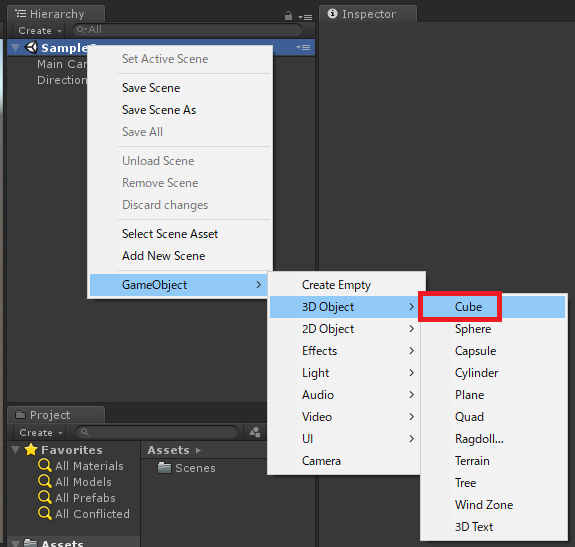
シーンを 右クリック し、「GameObject > 3D Object > Cube」を選択して新しいオブジェクトを追加してください。
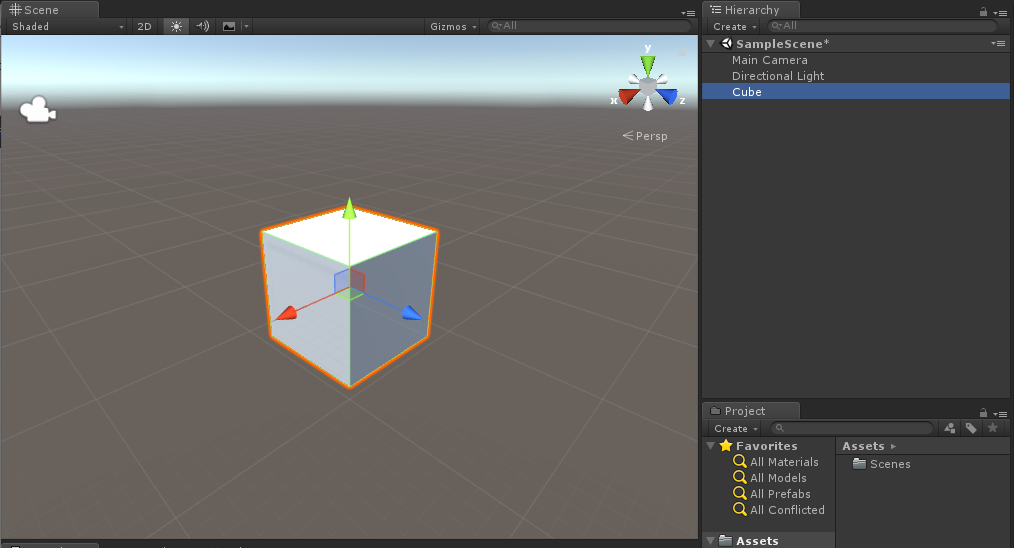
以下のように、シーンにキューブが追加されます。
次に今生成したキューブを Projectウィンドウにドラッグアンドドロップで持って行ってください。
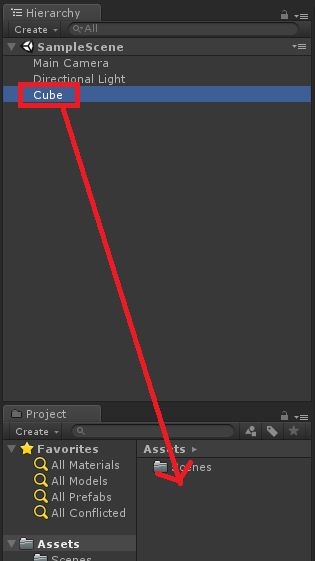
プロジェクトウィンドウに Cube のプレファブ(Prefab) が作成されました、すごく簡単に作成できます。

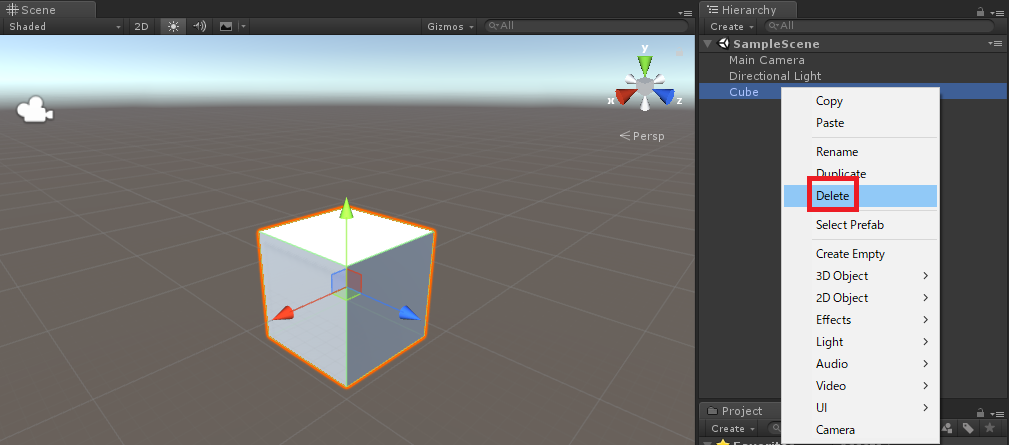
一度、プレファブ(Prefab)を作ったら元になったオブジェクトは不要になりますので、シーンからCubeを選択して消しておきましょう。
プレファブ(Prefab)の生成・使い方
プレファブ(Prefab)を使う場合は、基本的に C# スクリプトからソースコードにより生成を行います。その他にも Timeline 機能を使えば生成できますが本記事とは逸脱するので割愛いたします。
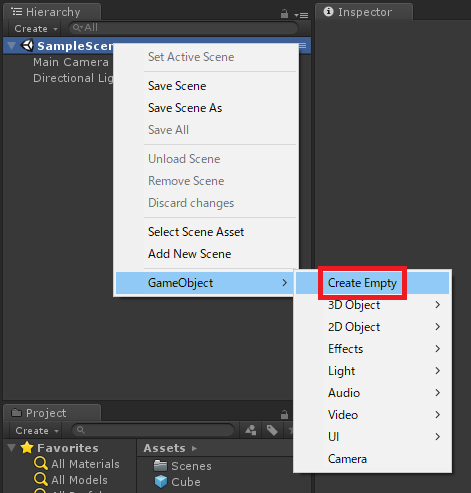
プレファブ(Prefab)の生成を行うために、スクリプトを実行したいので空のオブジェクトを作って、スクリプトを追加しましょう。
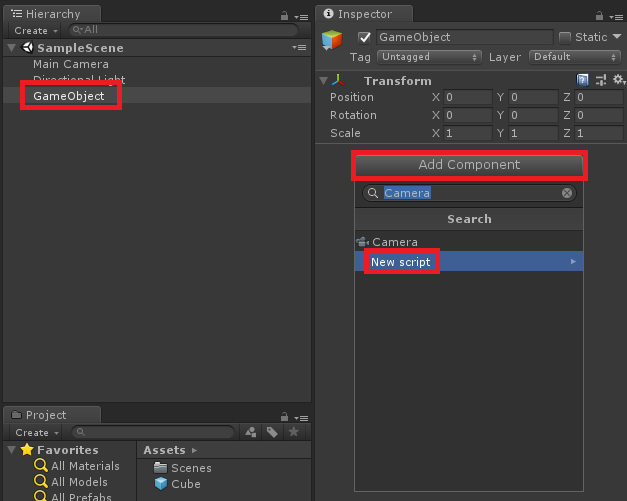
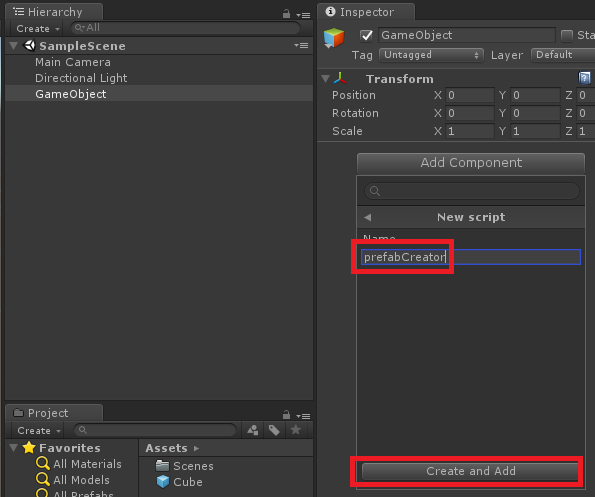
適当に、「prefabCreator」と名前を付けます。この名前はなんでもよいので好きな名前を付けましょう。
次に作成したスクリプトを Projectウィンドウから探して、ダブルクリックで実行しましょう。
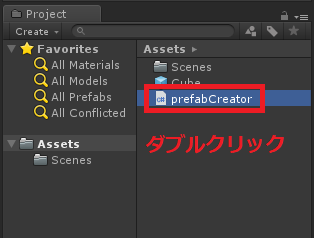
ダブルクリックで実行したら、VisualStudio が起動します。
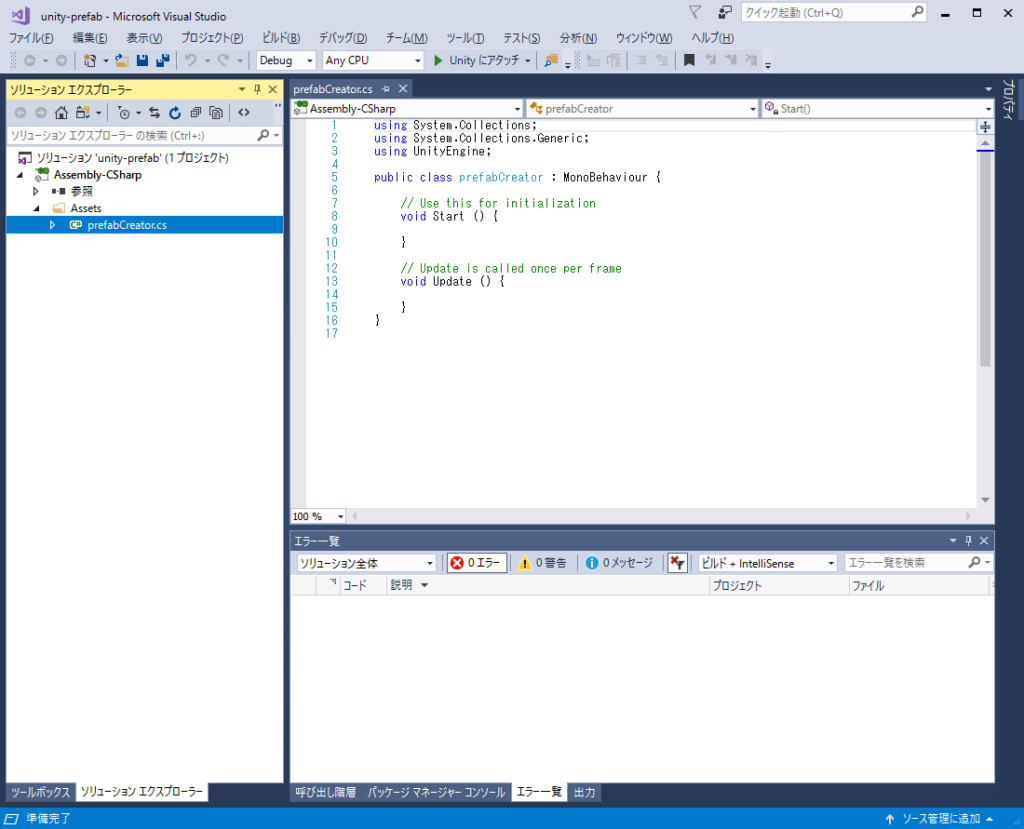
スクリプトは以下のスクリプトを張り付けてください。
簡単にスクリプトを説明すると、以下のようになります。
- Instantiate :これはプレファブ(Prefab)を設計図にして新しいオブジェクトを生成する関数になります。
- new Vector3(x * 1.2f, 0, 0) : これは新しいオブジェクトが配置される座標になります。
- Quaternion.identity : これは新しいオブジェクトの回転状態です、Quaternion.identityだとデフォルト値になります。
using System.Collections;
using System.Collections.Generic;
using UnityEngine;

public class prefabCreator : MonoBehaviour {

    public GameObject prefab;

	void Start () {
		for(int x = 0; x < 10; x++)
        {
            Instantiate(prefab, new Vector3(x * 1.2f, 0, 0), Quaternion.identity);
        }
	}
}
次に、Unity の Projectウィンドウから「Cube」プレファブを選択して、PrefabCreator の Prefab欄に設定します。
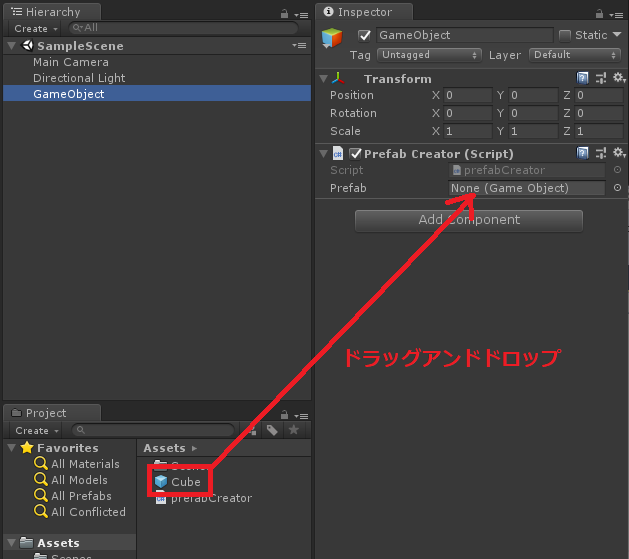
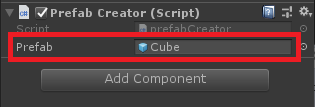
設定が上手くいくと以下のように表示されます。
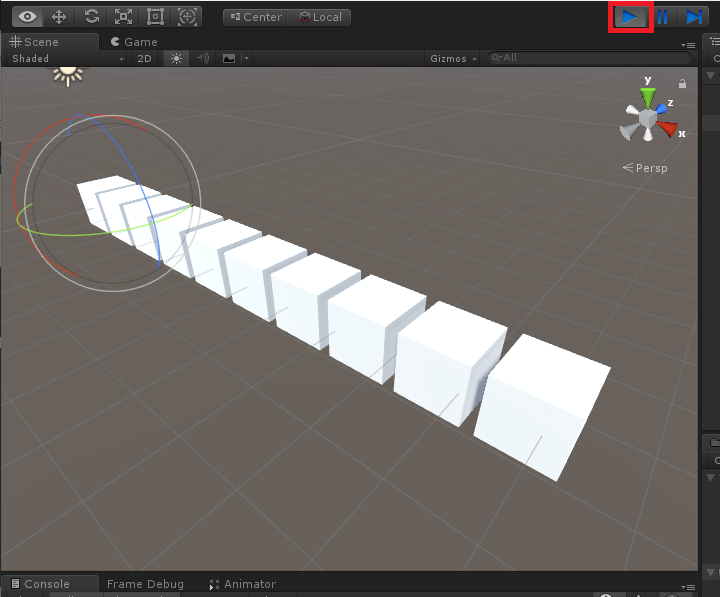
最後に、Unity上から実行してみてください。
以下のように10個のキューブが並べば今回の手順は正常に動作しています。
次によみたい記事
- Unityとは?
- 画面操作
よければ、SNSにシェアをお願いします!